Tuesday 30 December 2014

Soybean Production Guide

Soybean is an important crop because of its high nutritional qualities. Soybean has a high protein content of 40% by weight, 32% carbohydrate, 20% fat, 5% minerals and 3% fiber, and other trace substances. It is used as sources of protein in human food such as soymilk and tofu or soybean curd (taho and tokwa), soy sauce, animal feed and in industries. It is also used in industries as a source of edibleoil and the by-product of the oil extraction is the soybean cake used as animal feed. Based on the importance of this crop to human nutrition and industrial growth, there is the need to produce it in commercial quantity. 

Why grow soybean?

– It is good for food—soy-milk, soy-cheese, tofu, tokwa,
– It is the source of an excellent vegetable oil,
– It is used in industry,
– It improves soil fertility and controls the parasitic weed,
– Soybean cake is an excellent livestock feed, especially for poultry,
– The haulms provide good feed for sheep and goats.

Soybean Cultural Requirements

Climate and Soil

Areas with productive rice or corn crop are usually suitable to soybean production. The best cropping system is to rotate the wet season cereal crop with soybean.

Plant soybean towards the end of the wet season so that harvesting will coincide with dry weather. High humidity brought by continuous rains when the crop is maturing will severely reduce the quality of the harvested seeds. If planted in the proper time and location, all recommended varieties would mature in less than 100 days.

Soybean thrives well in areas with abundant water supply. For rainfed crop production, choose the locations with Climate Types E, F, and G. In Surigao (Type E), soybean is planted after the monsoon season, sometimes as early as February. In South Cotabato (Type F), soybean is planted as early as August after the wet season. In both locations however, unexpected rain during harvest time may lower the quality of seeds.

In areas with pronounced wet and dry seasons such as Central Luzon, you need supplemental irrigation for successful production. In Cagayan Valley (Type D) though, rainfed production is viable after the wet season crop. Plant as soon as possible to benefit from occasional rains. The dry period usually sets in April.

Choose deep (>1 m) well-drained clay or silt loam soils. The soil pH should be near neutral (5.5 to 6.5) since this is the best condition for the nitrogen-fixing bacteria found in soybean root nodules to develop.

Land Preparation and Planting

Prepare the land well so seeds can germinate uniformly, establish rapidly and compete less from weeds. For uplands, pulverize the soil thoroughly. For post-rice cultures, practice zero or minimum tillage.

Drill the seeds along shallow furrows spaced 50 to 60 cm apart or dibble the seeds in 20 cm x 20 cm hills at the base of the rice stubbles. The best planting depth is 3 to 5 cm.

The seed requirement for one hectare is from 25 to 50 kilos, depending on the daylength and rainfall. In any case, plant 10 to 20 seeds per linear meter of furrow or 2 seeds per hill.

Wet the soil sufficiently so seeds can uniformly germinate. For post rice cultures, flood the paddy 1 to 2 days before planting. For rainfed upland areas, there should be rain within the next 7 days after planting.

Water Management
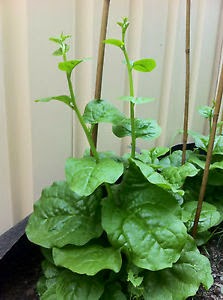
Healthy soybean plants
Soybean needs ample available water during the entire growing period (at least 500 mm). Residual moisture left over from the previous crop and occasional rains during the growing period are usually adequate. If necessary, irrigate heavily during the critical stages of growth such as at flowering, at pod formation, and at seed filling. We can obtain more than 3 tons of seeds per hectare in well-watered, fertile soils.

Nutrient Management

Since it is a legume, soybean obtains nitrogen through its symbiosis with the nitrogen-fixing bacteria in the roots. To take advantage of this natural system, apply the bacteria in the form of inoculant to the seed before planting. This inoculant can be obtained from the BIOTECH, UP Los Baños or the agriculture/” title=”View all articles about Department of Agriculture here”>Department of Agriculture outreach stations. Do not apply nitrogen fertilizers. Excessive nitrates from fertilizers will restrict nitrogen fixation.

Unless phosphorus and potassium are deficient in the soil, apply only the amount expected to be removed by the crop. A soybean crop yielding 2-3 t/ha takes up around 40 kg P2O5 and 60 kg K2O. If solophos or muriate of potash is not available, use the more common formulations such as 14-14-14. But the amount of nitrogen supplied should not exceed 30 kg/ha. Or, apply the fertilizers in the preceding rice or corn crop. The nitrogen will be used up by the cereal crop while the residual phosphates will still be available to the soybean crop.

In the case of micronutrients, apply only when necessary. Whenever possible, apply organic fertilizers.

Crop Protection

Insect pests. In the early vegetative stage, the bean fly is the most destructive insect pest. Once infestation sets in, insecticides cannot effectively control them. Compared to mungbean and cowpea, however, the soybean crop can recover from the initial damage. Provide the optimum cultural management for rapid vegetative growth.

Aphids also damage the young plants. They can also transmit deadly viruses. Insecticides however, can easily control infestation. Spray directly the aphid colonies.

During the vegetative stage, a number of larvae from Lepidopterous insects can defoliate the crop. Nevertheless, allow nature to control them. Soybean can tolerate occasional damage to ts leaves. If intervention is necessary, limit the choice of insecticide to Bt (Bacillus thuringiensis) formulations or highly specific insecticides. This will also help in controlling the infestation of pod borers during the reproductive stage. Pod borers, if widespread, can be very destructive and difficult to control.

From seed filling up to maturity, the stinkbugs suck the developing seeds. They are most prevalent among the later planted areas. Therefore, avoid late plantings in a given location.

Diseases. Soybean rust is the fungal disease prevalent during the cool, dry season. Severe infections during pod development usually result in considerably smaller seeds. On the other hand, purple seed stain is the fungal disease prevalent during periods of frequent rain. Severe infections during seed formation result in purple blotches of the seed coat. The recommended varieties have partial resistance to these diseases. However, use fungicides under heavy disease pressure.

Weeds. Soybean grows slowly for 2-3 weeks after emergence. Therefore, weed control is critical during this period. Before planting, prepare the land thoroughly. As soon as possible, cultivate the spaces between rows. Practice spot weeding. In areas where any of these methods are impractical, use chemical control. For zero or minimum tillage, apply a broad-spectrum herbicide before planting. In a well-prepared land, apply a pre-emergence herbicide. If necessary afterwards, spray post-emergence herbicides, depending on the type of weeds.

Harvesting and Processing
Ready for harvest
At maturity, soybean pods turn brown and start to lose moisture. Begin harvesting as soon as most of the leaves had shed and the pods are dry. Harvest early in the morning to minimize pod shattering. Harvesting of soybean is similar to rice. Cut the stalk at the base of the plant. Thresh manually or use a rice thresher but regulate the speed to minimize damage to seeds.

Clean and dry the seeds. For seeds intended for planting next season, dry to 9% moisture. While drying, do not expose these seeds to temperatures more than 43°C. Store the dried seeds in airtight containers. Stock these containers in a cool, dry place, protected from rodents. Practice good sanitation to prevent infestation of storage pest.

Costs and Returns of Soybean Production


For more information, please contact:

Institute of Plant Breeding
College of Agriculture
University of the Philippines Los Baños College, Laguna

Sources:

Farmers’ Guide to Soybean Production in Northern Nigeria
Soybean Growing commercially in Nigeria
Elmer E. Enicola (elmer_enicola@yahoo.com ),
Institute of Plant Breeding, UP Los Baños, College, Laguna

Reference Source http://businessdiary.com.ph/

Sunday 28 December 2014

How to Plant Alugbati

Alugbati (Basella alba), also called Indian spinach, malabar spinach and vine spinach, is an edible leafy plant popular in the Philippines. It grows best in hot weather, including summertime in Sunset's Climate Zones 3 through 24. Gardeners should plant it indoors during cool weather or outdoors after the soil temperatures reach 65 to 75 degrees Fahrenheit and nighttime temperatures are above 58 F. Since it is a climbing vine, it grows best with a trellis. It also prefers full sunlight and consistently moist soil. You can grow alugbati from seeds or from cuttings of an existing plant.

Preparing the Soil

1

Test the soil pH using an at-home testing kit. Alugbati tolerates a soil pH range from 5.5 to 8.0, but it grows best in soil with a pH between 6.5 and 6.8.

2

Add lime to raise the soil pH or sulfur to lower the soil pH, as needed. Apply any necessary additive at the rate indicated in the manufacturer's instructions. Soil pH additives generally come with instructions explaining how much to use to raise or lower the pH of a given garden area by a specific amount.

3

Add compost or other organic matter to the soil. Alugbati grows best in soils high in organic matter. Compost also improves soil moisture retention and drainage, helping to create the moist and loamy soil that this spinach prefers. Add at least a couple of inches of compost to the surface of the soil and mix it into the native soil with a tiller. Inland soils tend to be heavier than coastal soils, so they can use up to 6 inches of compost.

Planting from Cuttings

1

Take 8- to 10-inch cuttings from a healthy alugbati plant after soil temperatures reach at least 65 F during spring.

2

Soak the cuttings in water overnight or keep them in a dark and damp space for a day or two.

3

Plant the cuttings on hills or in rows. Space small hills six to eight inches apart and put three or four cuttings on each hill. Alternatively, space rows eight to 12 inches apart, with the cuttings spaced about eight inches apart.

4

Water the cuttings immediately and continue to keep the soil moist.

Planting from Seed

1

Scarify the seeds by using sandpaper or a knife to cut the outer seed coat.

2

Plant the seeds directly outside after soil temperatures have warmed to the minimum temperature required for germination of 65 F. Plant them about 1/4 inch deep in rows spaced about eight inches apart. Alternatively, spread seeds all across the soil and then thin the seedlings later so that they are spaced about eight inches apart.

3

Keep the soil consistently moist. If the soil dries out, the plants can flower, which makes the leaves taste bitter.


Tuesday 16 December 2014

Rice Production : Chapter 18 - Yield calculation

Introduction

Through analysis of comparative yields, the farmer and/or extension agent can determine which of the available rice varieties is best suited to local swamp systems and farming practices. Farmers are generally very shrewd at estimating yields, but they rarely quantify their estimations into standardized units of measurement. This chapter describes a straightforward, quick, and reasonably accurate method of yield calculation which will enable the extension agent to keep track of local yields for purposes of comparison and planning.

I. Farmers' Estimations

Just because a farmer may be unable to perform mathematical computations, do not assume that s/he has no accurate sense of crop yields. Never make the mistake of underestimating the knowledge of farmers, who after years and years of growing rice tend to become shrewd economists in their own right. Farmers pay very careful attention to yields (their livelihood and in fact their very survival depend on them), and although often they develop their own particular system of accounting, generally they know exactly how each crop yielded relative to other crops grown in other years. Some farmers count the number of bundles harvested, others keep track of numbers of bags filled, still others measure in terms of bushels of grain. Whatever the methodology, the farmer ends up with a pretty good idea of how well the crop yielded, and this information helps in planning for the future.

The extension agent requires a more quantitative and standardized method. It is important that yield calculations be quantitative (expressible in precise numbers) so that actual values may be compared from swamp to swamp, year to year, variety to variety. It is important that the method be standardized so that in every case measurement is made in exactly the same way.

II. Yield Calculation

Note: Since the method of yield calculation described below requires a certain amount of mathematics, it will not always be possible to teach it to farmers. Nor will this be necessary, since for their own accounting purposes farmers can perfectly well continue to rely on their time-tried methods. However, it may be a good idea to teach the method to other extension agents. As agriculturalists, they will be working in more than just one farming system, and it will be useful for them to know how to calculate yields for comparative purposes.

Calculating yields is a two-step process involving sampling the crop and calculating the yield.

1. Sampling the Crop

Sampling a crop of rice means measuring the yield of a small fraction of the total crop area. The sample should be representative of the crop as a whole (i.e., taken from an "average" section, not from a noticably lush section, nor from a section in which there has been unusual crop damage). The sample should also be large enough to be accurate -generally 10m2 is considered satisfactory. For ease of measurement, harvest ten "minisamples of 1m2 each to add up to the total sample of 10m2 Within the crop area to be sampled, peg out ten "mini-samples" of 1m2 each. Cut all the panicles within the "minisamples" and collect them in one place. Thresh the grains, being careful not to lose any (a small error in sampling may lead to a large error in calculating the yield). Sun-dry the grains for 2-3 days, or until the moisture content is close to the 14% considered suitable for storage. (It is important that the grains be well-dried, since undried grains are considerably heavier and will produce inaccurate yield figures). Winnow out all unfilled grains and carefully weigh the remaining rice.

2. Calculating the Yield

If taken exactly as described above, the sample will contain the yield of 10m2 of the total crop area. Since yields are generally expressed in terms of kg/ha (kilograms of grain per hectare), the problem now is to convert the yield figures derived from the sample (kg/10m2) into the standard units of measurement (kg/ha). Since

1 ha = 10000m2, the sample area constitutes 10/1000 ha, or 1/1000 ha.
Therefore, to determine the average crop yield in kg /ha simply multiply the weight of the sample by 1000.

Example: Careful sampling of ten 1m2 "mini-samples" results in 550g (.55 kg) of dry grain. What is the yield of the crop in terms of kg/ha?

Weight of sample =.55 kg
Area of sample = 10m2

Yield in kg/ha =.55 kg/10m2 x 1000 = 550 kg/ha.

Notes Yields measured in kg/ha can be converted into lbs/acre or bushels/acre using the following conversion rates:

1 kg = 2.2 lbs
1 ha = 10000 m2
1 lb =.453 kg
1 ha = 2.47 acres
1 bushel = 60 lbs
1 acre = 43560 f2
1 bushel = 27.18 kg
1 acre =.405 ha

References

Rice Production Manual (Revised Edition, 1970) Compiled by the University of the Philippines College of Agriculture in cooperation with the International Rice Research Institute (IRRI)

The definitive handbook for the extension agent working with upland or irrigated rice; includes comprehensive information about all aspects of rice cultivation, including plant growth and development, soil chemistry, response to fertilization, water management practices, etc. Available by direct mail order from: Salesroom, Department of Agricultural Communications (DAC), University of the Philippines, College of Agriculture, College, Laguna, Republic of the Philippines. One copy available through ICE to Peace Corps in-country resource centers/libraries.

Soils, Crops, and Fertilizer Use - A Guide For Peace Corps Volunteers, by Dave Leonard (ICE Reprint #8, Peace Corps). A condensed, readable, information-packed booklet dealing with technical aspects of soil chemistry, plant nutrient uptake, and fertilization; a valuable complement to this manual, especially for those lacking formal training in agriculture. Available to PCVs through ICE, Peace Corps, 806 Connecticut Avenue, N.W., Washington, D.C. 20525.

Apply Pesticides Correctly (U.S. Department of Agriculture, U.S. Environmental Progection Agency)
Although self-described as "A guide for commercial applicators," this pamphlet provides excellent background information useful to the extension agent; includes coverage of types of pests, pest control methods, pesticides, labels and labeling, pesticide use, laws and regulations; recommended particularly for those with little experience with pesticide use. Available to PCVs from ICE (see above).

Pest Control in Rice (PANS Manual No. 3 - Centre for Overseas Pest Research, London) The definitive guide to pest control in rice; very comprehensive, including discussion of weeds, diseases, molluscs, nematodes, crustacea, insects and mites, birds, and rodents. Address requests for single copies to: Centre for Overseas Pest Research, PANS Office, College House, Wrights Lane, London W8 5SJ, UK.

Glossary of Terms

BUND - A raised dirt bank built in a swamp to' block water.

HEADBUND - A large earthen dam constructed at the head of a developed swamp.

PADDY - A bunded, well leveled field with almost perfect water control. A paddy is the ultimate land development goal for high level rice production by individual farmers.

PUDDLING - A leveling process used to break down the structure of wet soils.

SWAMP - A depression in the landscape which can vary from a shallow to a deep waterlogged area which may or may not dry out during the year.


Monday 15 December 2014

Rice Production : Chapter 17 - Harvesting, threshing, drying, storage

Introduction

The final steps in producing a crop of rice -harvesting, threshing, drying, and storage -often are taken for granted by the extension agent. It is natural to assume that the major part of the work lies in growing the crop, and that farmers will know what to do once the grains have ripened. But this is a mistaken assumption. The fact is that a large percentage of the crop can be (and often is) lost through improper harvesting, threshing, drying, and storage practices. This chapter describes the traditional methods of processing and storing rice and includes ideas for improvement.

I. Harvesting
Manual harvesting

Most harvesting problems in Sierra Leone can be attributed to the fact that irrigated rice tends to ripen irregularly. At the end of the rainy season, when most varieties mature, frequent rains and a lack of continuous sunshine protract the grain ripening process and make difficult proper timing of harvesting, since grains even on the same panicle ripen at varying rates. If the crop is harvested too early, many green grains will be lost, because the high water content will lead to rotting. If, on the other hand, the crop is harvested too late, the rice will over-ripen and easily shatter. Furthermore, the unnecessary delay will expose the grains to increased bird attack, which can be devastating.

As harvest time approaches, the plants should be inspected daily, particularly the panicles on the most mature tillers. The proper time to harvest is when approximately 85% of the panicles are ripe. "Ripe, means that 90% of the spikelets are golden and hard, yet not so dried out as to shatter easily. The lowermost spikelets on each panicle will ripen last, but even they should be at least at the hard dough stage. The color of the leaves and stems should not be used as an indicator of the ripeness of the grains, since many varieties tend to have some green stems and leaves even when the grains are fully ripened.

Although grain ripening cannot be fully controlled by the farmer (climate and varietal characteristics will always be the major determinants), drain the plots 7-10 days before anticipated harvesting, i.e., when most of the grains are at the hard dough stage. This will contribute to even drying and facilitate harvesting by making it easier to walk inside the plots.

The traditional method of harvesting practiced throughout most of Sierra Leone involves panicle cutting. Harvesters grasp each stem several inches below the lowermost spikelets and cut it with a small straight knife. The panicle is retained and added to the growing bundle held in the hand. When the bundle becomes awkwardly large, it is tied together with a wisp of straw and carried out of the swamp. The chief advantage of panicle cutting is that the straw remains behind in the field. Bundles of rice produced by panicle cutting are easy to transport, easy to store, and easy to thresh. However, panicle cutting has several distinct disadvantages: it is very time-consuming, and since each panicle is handled frequently many grains shatter (fall to the ground).

In some areas of Sierra Leone, harvesting is done with the sickle. Sickle harvesting, popular in Asia, is very fast, since entire bunches of stems are grasped and cut in one swift motion. However, sickle harvesting requires the use of threshing machines - either the pedal thresher or the threshing table. At present few farmers possess threshing machines or know how to build them, so sickle harvesting remains relatively unpopular.

II. Threshing
Power Thresher

Rice that has been harvested by traditional panicle cutting is very easily threshed, since very little straw remains with the grains. The harvested bundles of rice are placed on a clean, hard surface and beat with sticks to separate the grains from the straw (dried leaves and stems). Frequently the threshers will walk over the bundles to speed the process. If any grains remain clinging to the straw, they are separated by pounding in wooden mortars.

Rice that has been harvested by sickle cutting must be threshed by other means, since the grains must be separated from a relatively large amount of straw. Usually a threshing machine is used to increase efficiency. The pedal thresher is a revolving drum (often an old oil drum) studded with nails or wire hoops which strip the grains from the panicles when bundles of rice are held against the moving drum, The pedal thresher is effective and fast, and it can be moved from plot to plot to eliminate extensive transportation of the cut plants. The mayor disadvantage of the pedal thresher is its price (about Le 150, or $150), which makes it too expensive for individual private ownership. However, farmers associations have been known to share pedal threshers with good results, since in most cases each individual's entire crop can be harvested and threshed in a few days. Another threshing device, the threshing table, is a slatted table constructed of bamboo, wood, or any suitable locally-available materials. Sheaves of rice are beaten against the table surface, dislodging the grains to drop through the slats into the collection area below. Threshing tables work best with those varieties in which the grains separate easily from the panicle, but the crop must be extremely dry for threshing to be effective.

III. Par-Boiling
Par-boiling 

In some parts of Sierra Leone, an intermediate step in the processing of rice is parboiling. Par-boiling improves storage quality of the grain and consequently is popular among farmers who produce rice for market. Although techniques vary, par-boiling usually involves soaking the grain in water and steaming over a slow fire in covered pots. Parboiling has several effects:

- cracks in the grain are "melted" together, leaving fewer broken grains and resulting in reduced loss during milling.
- several of the thin protein layers underlying the husk are boiled into the endosperm, thus increasing the protein content of the crop.
- the grain becomes significantly hardened, making par-boiled rice less susceptible to insect attack.
- the grain's tendency to absorb moisture from the air decreases, so that par-boiled rice keeps longer in storage.
- the husk soften and cracks during par-boiling, making it easier to mill.

But par-boiling also has disadvantages:

- par-boiling is labor-intensive
- par-boiling alters the sight, smell, taste, and texture of the rice and generally decreases its eating quality.
- par-boiled rice is harder and therefore takes longer to cook.

When it comes to the question of whether or not to parboil, there is no such thing as a "recommended" practice. Depending on the circumstances, par-boiling may or may not be economical and/or desirable. If grain loss during milling, protein content, or storage quality are important to the farmer, par-boiling may be preferred. If labor considerations, eating quality, or cooking time are important, the rice may best be left rough.

IV. Drying
Sun (solar) drying 

Before milling and storage, rice must be dried thoroughly. Rice which is not dried properly may crack during milling, or spoil during storage. At the time of harvesting, rice usually has a moisture content of 20-26%. This must be reduced to 12-14% before milling or storage can safely occur.

After threshing, the rice should be spread in the sun to dry. Constant turning is necessary to ensure slow, even drying and prevent cracking. Two to three days uninterrupted sunshine will suffice. Farmers often bite the grain to test for dryness (and usually they have a pretty good sense of what they're doing), but the extension agent may want to resort to this simple test'

1) Place in a small glass Jar (with a screw top) a handful of grains.

2) Add a spoonful of ordinary salt and seal the top.

3) Store 24 hours.

4) After 24 hours, examine the contents of the Jar. If the salt clumps together, the rice is too wet to mill or store. If the salt remains well dispersed, the rice has a moisture content of 15% or less and can safely be milled or stored in bags.

V. Storage
Rice storage facility

Rice harvested by panicle cutting traditionally is stored up in the rafters of the farmhouse or kitchen. The bundles are transported from the fields and stacked on reed mats high up off the ground, often over the cooking area so that smoke will sift in among the grains to assist drying and discourage insects. Where bags are readily available, the rice is often threshed and bagged for storage.

Rodent attack is generally a major problem. Since storage facilities are constructed of mud adobe and/or wood, rats easily gain access to feed on the rice. It is difficult to estimate accurately the annual crop loss to rodents, but 15% seems reasonable. In some instances, the loss is probably a good deal higher.

The key to effective grain storage lies in the construction of proper storage facilities. A good storage facility should be:

- plastered inside and out
- well ventilated
- well lit
- dry
- clean
- cool
- rat-proofed (heavy screen over windows and ventilation shafts)

After proper drying, threshed rice should be packed in bags and stored on wooden pallets in the storage facility. Instruct the farmer to stack the bags so as to allow good ventilation, since free air movement between the bags will prevent mildew and/or spoilage. Do not allow the bags to come into direct contact with the floor or walls, since moisture tends to condense where there is contact. If they are available, set rat traps (or get a cat!). Encourage the farmer to check the rice periodically for signs of spoilage and/or pest infestation.

Reference: FAO Rice Production

Sunday 14 December 2014

Rice Production : Chapter 16 - Management of flooded soils

Introduction

Under continual flooding, swamp soils develop characteristics which are fundamentally different from those of upland soils. Although it is not essential that the farmer have a complete technical understanding of the differences between the two types of soils, it is important to know about some basic properties of flooded soils so that management practices will be appropriate for local conditions. This chapter describes basic properties of flooded soils and recommends measures that may be adopted to help overcome the sorts of soil problems most often encountered in swamp farming systems. In addition, the problem of iron toxicity is discussed.


I. Characteristics of Flooded Soils

Three major changes - physical, biological, chemical - occur when a soil is flooded. A brief review of these changes will help lead to a better understanding of soil management practices which will maximize yields in irrigated rice.

1. Physical Changes

Upon flooding, the pore spaces (air spaces) in the soil become saturated with water. As a result, the soil swells, and hard clods soften and break into small aggregates. Puddling completely destroys the remaining structural aggregates (clods and clumps) and transforms the soil into a sludge, or soupy mixture. This slows the drying of the soil, since the exchange of air between the atmosphere and the soil is impeded, and since the water particles are held by soil particles and prevented from percolating downward and escaping.

2. Biological Changes

The absence of soil air (and particularly oxygen) in flooded, puddled soils causes a change in the varieties of microbes, or microscopic organisms which live in the soil. Microbes existing in the absence of oxygen are known as anaerobic microbes, and they tend to be much slower, less efficient decomposers of organic matter than their aerobic cousins. Consequently, the rate of decay of organic matter tends to be slow in flooded soils. Also, the end products produced by anaerobic decomposition differ' some are toxic to rice, particularly those released during the first two weeks after decomposition begins. This can be important in timing organic matter incorporation between plantings: if the farmer plants too early into a flooded plot containing plowed-under stubble and/or chaff, the toxicities produced during normal decomposition may stunt the growth of the rice.

3. Chemical Changes

Flooded soils develop two distinct chemical zones. (see figure below) The upper zone, a thin 1-10 mm, absorbs oxygen from the water, turns brown in color, and reacts to nitrogen like an unfolded soil. This zone is called the oxidized zone, in reference to its chemical condition of being oxidized. The lower zone, which extends down as far as the water, is extremely low in available oxygen, turns dark blue or gray in color, and takes on chemical properties quite different from those of the oxidized layer above. This lower zone is known as the reduced zone.

When a soil is flooded, the nitrogen in the incorporated plant (and animal) residues is changed to the ammonium form (NH4), which is stable under flooded conditions and will later be used by growing rice plants. If the soil is allowed to dry thoroughly (e.g., when it is drained for plowing), a micro bacteriological change takes place during which the ammonium form of nitrogen is changed to the nitrate form (NO3).

When the soil is later re-flooded, part of the nitrogen held in the nitrate form is changed into nitrogen gases (N2, NO3) ) and escapes into the air. Between 20-700 kg/ha of nitrogen can be lost through this process, known as denitrification, so it is extremely important to keep the Plot thoroughly flooded at all times after initial irrigation has taken place.


Figure: Flooded Soils and De-nitrification


II. Management of Problem Soils

All swamp farming systems are not created equal. Although swamps tend to look the same from the ground, often they vary considerably below the surface. Some swamps are shallow and sandy, others deep and peaty, still others filled with rock or clay deposits. Because soil characteristics significantly affect plant growth, the farmer should know what steps should be taken to minimize soil-related problems.

The key to management of problem soils lies in anticipating potential problems before they occur and taking the steps necessary to head them off. Problem soils can be attacked three ways' 1) through the selection of an appropriate variety, 2) through proper swamp development, and 3) through effective management practices. Never wait until after the crop is in the ground to begin thinking about soil problems, since by then it will be too late to change varieties or modify the water control system.

Always begin thinking about the soil early in the development process. The very first time you visit a farmer's swamp, take the time to dig a few scattered pits to reveal local soil characteristics. Question the farmer about the depth of the topsoil, about the type of underlying material, about the presence of undecomposed organic material, etc. With a little practice, you will learn to identify problem soils long before planting time, and consequently you and the farmer will be able to devise an effective strategy involving development, varietal selection, and crop management.

A. Sandy Soils

Many swamp systems in Sierra Leone are extremely shallow and sandy. The main problem with sandy soils is leaching: water percolates through sand very easily, carrying away nutrients and bringing in toxic materials. Effective water control is difficult, because sandy soils do not retain water well' as a result, drought stress is common among crops grown in sandy swamps. Nutrient deficiencies occur regularly, as evidenced by stunting, yellowing of the leaves, and low tillering.

To treat sandy soils:

1) Development practices

Develop the swamp so as to discourage leaching. There are several ways to slow movement of water through the soil'

- keep the main drain shallow (so it will not "suck" water from the plots).
- dig deep peripheral gutters (to intercept groundwaters percolating down from adjacent hillsides).

2) Varietal Selection

Select a variety which does well under relatively difficult conditions, i.e. a variety which can withstand an irregular water regime, nutrient deficiencies, and soil toxicities.

3) Management Practices

To minimize leaching and the damage it cases:

- keep a constant, slow-moving or non-moving flood on the plots.
- spread out fertilization by applying top dressings in many small splits.

To improve the structure and fertility of the soil, as well as to improve its ability to retain water, incorporate large amounts of organic material before and, if necessary, after the growing season.

B. Peaty Soils

Swamps which remain permanently flooded often contain large amounts of undecomposed organic matter (because the soil never gets a chance to dry, which means that aerobic decomposition never occurs). Peaty soils are characterized by high acidity and the presence of numerous toxic materials, both of which severely affect crop growth. Peaty swamps are easily recognized by matted clumps of undecomposed organic material, noxious gases, and mineral slicks. Rice grown in peaty soil is usually stunted, browning, and low tillering.

To treat peaty soils:

1) Development Practices

When developing the swamp, be sure to dig an effective drain. The main drain should be extremely deep to draw water not only from the surface of the plots, but from beneath the surface as well.

2) Varietal Selection

Select a variety which does well under conditions of high acidity. An iron toxicity-resistant variety is usually a good bet, or a native variety.

3) Management Practices

To enable aerobic decomposition of organic material in the soil:

- continually drain the plots.
- till the topsoil during the dry season to a depth of several feet, if possible (encourage the farmers to construct vegetable mounds).

To prevent incorporation of additional organic material into the soil, burn all grasses, weeds, and crop residues (stubble, chaff, etc.).

C. Clays

Clays have a high natural fertility, but often they resist giving up their nutrients to plant root systems. Furthermore, because of their dense structure (they are composed of extremely small, tightly-packed particles), they tend to be difficult to work. Therefore, improving the structure of clays should be the farmer's primary goal. When the clay is fairly dry (just before it starts to crack), begin tilling to increase aeration. Incorporate large amounts of organic material, and practice crop rotation to help maintain fertility.

III. Iron Toxicity
Iron toxicity

Iron toxicity is a soil-related condition caused by the presence of too much iron in lowland rice paddies. Occurring in virtually all regions in Sierra Leone, iron toxicity results from a complex set of chemical imbalances tin the soil and in the plant) which in many instances severely inhibits yields. The condition occurs most commonly in sandy areas of swamps adjoining upland slopes, or in peaty areas where drainage is poor.

The symptoms of iron toxicity are numerous and varied, but the most typical indication is a marked bronzing of leaves and stems, generally occurring 4-7 weeks after transplanting. In addition, roots are stunted, coarse, and reddish brown or dark brown in color ( a coating of iron oxides reduces root surface and decreases capacity to absorb soil nutrients). Plants are stunted and tiller poorly. In extreme cases, black or brown spots appear on leaves and stems, and leaf edges turn dark brown and roll in toward the midrib.

The causes of iron toxicity are technically complex and hence difficult to describe succinctly. Very simply, the presence in the soil of excessive quantities of iron inhibits nutrient absorption by the plant and leads to severe nutritional imbalances which manifest themselves in the typical symptoms. The intake of phosphorus and potassium is especially inhibited, and it is the relative lack of these two primary nutrients (in conjunction with the relative abundance of nitrogen) which causes many of the symptoms.

Treatment of iron toxicity can take several forms. Swamp development measures which can help prevent development of a situation favorable to iron toxic conditions include deepening peripheral gutters in sandy swamps (to decrease percolation of iron compounds down from the uplands) and improving drainage in peaty swamps (the mineral slicks in peaty swamps are often associated with iron toxicity). Fertilization with large amounts of phospherus and potassium can be effective, although application of nitrogenous fertilizer generally aggravates the symptoms (since nitrogen is relatively available to the plant already, and the presence of nitrogen in the absence of phosphorus induces the symptoms). The most effective treatment in any case is selection of iron-toxicity-resistant varieties. Certain varieties (often traditional varieties) are able to flourish in iron-toxic soils, and they offer the most practical and economical solution to the problem.